

Mastering Laravel Excel: A Guide to Effortless Installation and Seamless Data Import/Export


This artical talks about:
Installation of laravel excel
overcoming the problems faced during installation
Basic import and export of data
prerequisite
- create a new project and migrate the default database
Installation
If you have PHP: ^7.2\|^8.0 then high fives! you may simply install it using the following command
composer require maatwebsite/excel:^3.1
However most of you would face a problem while installing it. Here I would provide a solution where you can install it without downgrading your PHP version or without making any changes to your xampp files.
This command installs the "maatwebsite/excel" package in any available version.
composer require maatwebsite/excel:*
Now your composer.json file should have "maatwebsite/excel" with a "*" .
"require": {
        //...
        "maatwebsite/excel": "*"
    },
Note : This isn't a good practice. Therefore we would make some changes.
We replace the "*" with "^3.1.48"
"require": {
        //...
        "maatwebsite/excel": "^3.1.48"
    },
Now we will install the dependecies for the package
composer update --ignore-platform-req=ext-gd
--ignore-plateform-req=ext-gd this is used to ignore the requirement for the ext-gd PHP extension. And this is important inorder to install the packages in your local system. This is done only for your local machin inorder to create project using the functionality of the package and to learn this technology.
Configuring the package
add the service provider within the config/app.php file
config/app.php
'providers' => [
        //... Other Service Providers
        Maatwebsite\Excel\ExcelServiceProvider::class,
    ],

    'aliases' => Facade::defaultAliases()->merge([
        //...
        'Excel' => Maatwebsite\Excel\ExcelServiceProvider::class,
    ])->toArray(),
Once you have added the service provider now run the following command. The following command would create a excell.php file within your config directory by copying the configuration files provided by "Maatwebsite\Excel".
php artisan vendor:publish --provider="Maatwebsite\Excel\ExcelServiceProvider" --tag=config
If you don't see the Export folder within your app directory then create it first. Next, to generate an export class for the User model, you need to run the make:export Artisan command while specifying the model.
mkdir app/Export
php artisan make:export UserExport --model=User
Now within your app/Exports directory UserExport.php should have got created. And it would look somewhat as follows:
<?php

namespace App\Exports;

use App\Models\User;
use Maatwebsite\Excel\Concerns\FromCollection;

class UserExport implements FromCollection
{
    /**
    * @return \Illuminate\Support\Collection
    */
    public function collection()
    {
        return User::all();
    }
}
Logic
Now we would write our logic for the import and export. To do so lets first create a controller using the following command
php artisan make:controller ExcelDataImportExportController
userExcelToDatabase
First we would create a function as userExcelToDatabase.
At first you need to retrive the file as follows that was uploaded
$file = $request->file('excelFile');
Here excelFile is the name of the name of field that your input field would have. For example:
<input type="file" name="excelFile">
Now once you get the file you need to extract its data as array using the toCollection method provided by the Excel maatwebsite package.
$fileData = Excel::toCollection([],$file)->first();
The toCollection method takes $file as its argument, this $file is the file that we extracted before.
creating our users excel file
Let's create a excel file with some data.
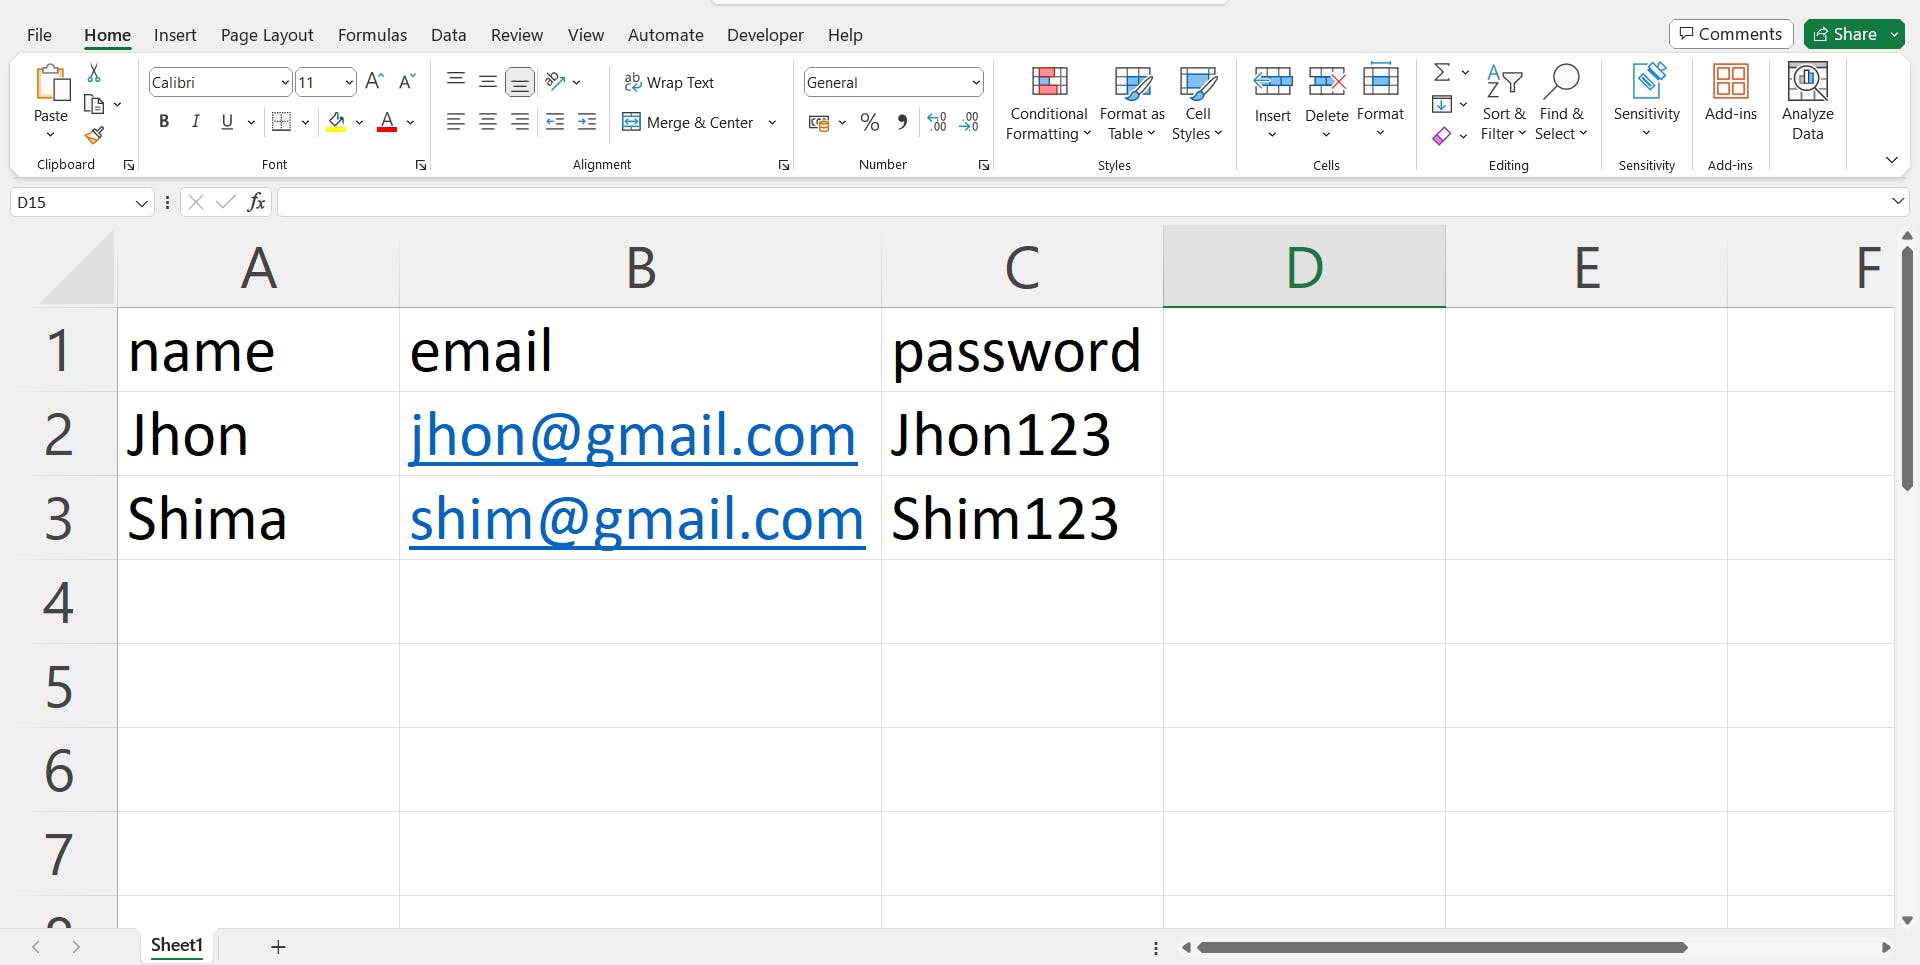
Your file should look like as shown above to follow along and the order is important so do not alter it to follow along.
This are the fields in user table that are fillable and you need to provide the data for it. The data may differ but maintain the order as to follow along.
Here the first row that specifies the field name are only valuable for us humans. But you don't want to enter this data into your database and sometime may lead to some anomalies. So, we would maintain a variable $isFirstRow and set it true. Next we would use a foreach loop to retrieve data one by one and skip the first row.
foreach ($fileData as $row){
    if($isFirstRow){
        $isFirstRow = false;
        continue;
    }

    try {
        User::create([
            'name' => $row[0],
            'email' => $row[1],
            'password' => $row[2]
            ]);
    } catch (\Throwable $th) {
        return response(["Error" => $th],500);
    }
}
When the loop runs for the first time we would check if isFirstRow is true and set it to false and move for the next row. Using try catch is not necessary but using it would produce a comprehensive error message and in production it is very important to handle the error produced.
The row's data is then maped to the respective fields and we run insert query one by one for each user from excel sheet to database user table. This was the reason for which I asked you to maintain the order. Since, now you know the logic you may now play around with it and may try to challenges provided below after the complication of it.
Your final function should look like:
function userExcelToDatabse (Request $request){
        $file = $request->file('userDataExcelFile');

        $fileData = Excel::toCollection([],$file)->first();

        $isFirstRow = true;

        foreach ($fileData as $row){
            if($isFirstRow){
                $isFirstRow = false;
                continue;
            }

            try {
                User::create([
                    'name' => $row[0],
                    'email' => $row[1],
                    'password' => $row[2]
                ]);
            } catch (\Throwable $th) {
                    return response(["Error" => $th],500);
            } // end of try catch

      }    //  end of foreach

      return response(["message" => "successflly added users"],200);
}
Next you need to create a route that would call this function
Route::controller(ExcelDataImportExportController::class)->group(function () {
    // ... other routes
    Route::post('/importExcel','userExcelToDatabse');
});
userDatabaseToExcel
I promise to keep this simple and sort. Now you know how to import data from excel sheet to database. Let's now export data from our databse table to user as excel sheet. If you are following along then you just need to create the userDatabaseToExcel function and add it to the controller, else you would need to perform all the tasks untill creating controller once.
You first need to import the userExport that we created into your controller file. We would use the download method provided by the Excel maatwebsite.
Excel::download(new UserExport, 'user.xlsx',\Maatwebsite\Excel\Excel::XLSX,[
        'Content-Types' => 'text/xlsx'
     ]);
The download method takes Export object as it's first argument. Then the name of the file. This would be the name of the file that the user would be provided with while downloading the file. Next, it takes the extention of the file. You may use othe extentions as well that are available such as CSV, TSV, ODS, XLS. You may also customize the header although it is an optional field and you may not specify it.
Finally you return this file and your final function look like as follows:
function userDatabserToExcel (){
    return Excel::download(new UserExport, 'user.xlsx',\Maatwebsite\Excel\Excel::XLSX,[
            'Content-Types' => 'text/xlsx'
        ]);
}
Create a route that would call this function
Route::controller(ExcelDataImportExportController::class)->group(function () {
    //... other routes
    Route::get('/exportExcel','userDatabserToExcel');
});
Congratulations! you have successfully learned how to import and export data from database using laravel.
Tasks for you
Basic
Build an ui application using this as your backend logic
Advance
Think that you are a backend developer at amazone. You are provided with a database that consist of products, customer, tables and necessary temporary table. Now generate an invoice for the user in pdf format that consist of order id of the product, price, product name from product table and user's full name from customer's table with order date and unique invoice id.
Note: You are not allowed to create any order table.
Next you need to store the ivoice you provided to user into your storage as well. It may be the storage provided by default by the laravel or s3 bucket or any cloud storage.